
You know that moment when you find the perfect jacket and then realize it needs something? Something with a bit of personality, like a patch. So you start scrolling, and suddenly there are forty styles, six backings, and a dozen sizes, and you have no idea which one won’t peel off after the first wash.
Almost everyone has been in this situation, but it’s good that patch selection doesn’t involve much effort after you understand the essential features of a patch, which are type, size, and proper position on your garment.
What Do You Actually Want the Patch to Do?
Before anything else, decide the job. This one question saves a lot of time.
It could be a logo for a company’s uniform or an unwanted rip in your best pants, and you may wish to keep the trousers instead of throwing them away.
A logo patch needs crisp edges and readable text. A repair patch doesn’t care much about looks. A patch that looks decorative can be messy, and no one will complain.
A patch made for repairing does not care about appearances. It just has to be strong enough and more or less similar to the material of the garment. You should also think about who will wear it. For example, patches that are made for children have to be soft and level because they can’t irritate the skin. People should also be practical about the lifespan of the patch. A patch for a once-off occasion can be simpler and cheaper. But one for a daily-wear jacket deserves better quality. Answering those questions will eliminate half of the trouble.
Which Type of Patch Would Work for Your Clothes?
Most patches fall into a few families, and each one has a personality.
Embroidered Patches
Embroidered patches are the ones everyone pictures. Thick thread on a fabric base with a little texture you can feel with your thumb. It looks good on uniforms and simple logos. Where it struggles is tiny text. Small letters tend to fill in and look blurry.
Woven Patches
Woven patches can tackle this issue since their threads are thinner and tighter, which makes the surface smooth, making readability possible even for small letters. Furthermore, the thin patch is advantageous for more applications since it can be used even on thin fabric, which cannot take the weight of a thicker patch.
Chenille Patches
Chenille is the fuzzy varsity-jacket look. Big letters, bold shapes, lots of texture. Don’t try to put a detailed design on it. Fine lines just disappear into the pile.
Other Patches Examples
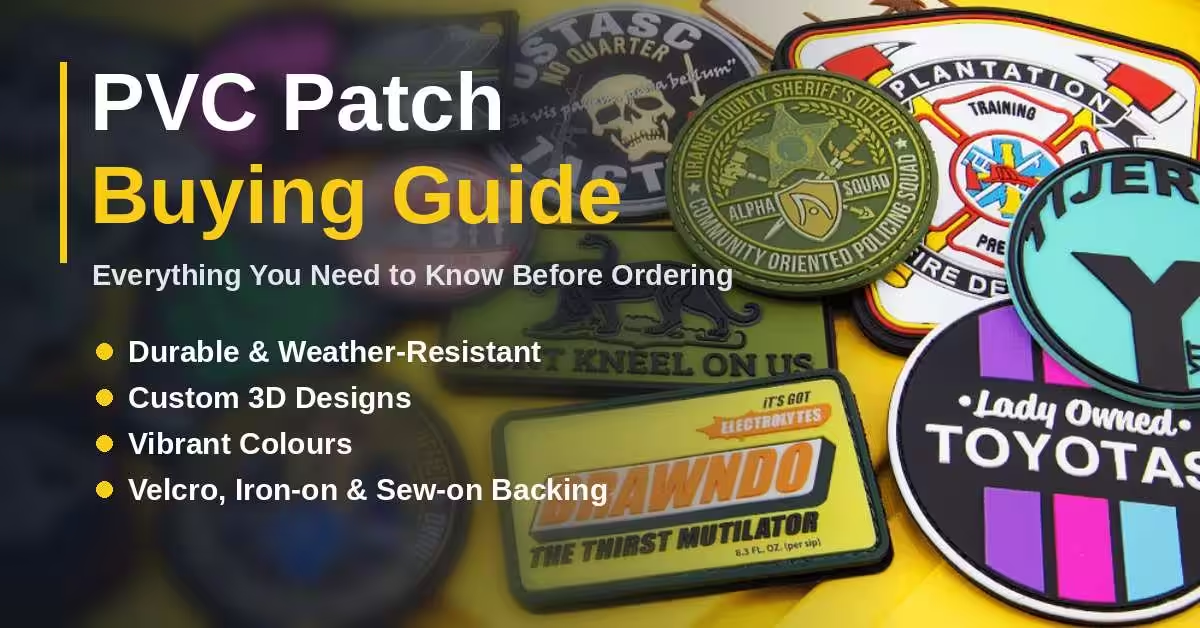
There are some additional alternatives that one can also look into. Rubber PVC patches are waterproof, making them a great choice for bags and outdoor items. Leather patches look great on denim. Printed patches can reproduce full-colour artwork or even photographs but might be more appropriate for casual clothes rather than tough apparel.
Patch Type Comparison
| Patch Type | Best For | Key Feature |
| Embroidered | Jackets and uniforms | Classic and textured look |
| Woven | Small details and thin fabrics | Clear and smooth finish |
| Chenille | Large letters | Bold and fuzzy texture |
| PVC | Bags and outdoor gear | Water-resistant |
| Leather | Jeans and denim | Rugged appearance |
| Printed | Detailed artwork | Full-color designs |
Why are the Best Sew-On Patches Worth the Extra Effort?
Using glue is a simpler method and saves time. But when the fabric is going to be washed regularly, sewing is the right thing to do. Since stitches are much sturdier than glue, which degrades over time, the best sew on patches are specifically the ones that are most ideal for denim clothing and bag material.
But how can you tell which ones are good? Start by examining the border first. A nice edge that is thick and well stitched (also known as a merrowed border) helps prevent fraying. Oddly shaped patches tend to have laser-cut edges instead. Patches in other shapes often have edges that are simply laser-cut. To determine the quality of the patch, one can pull on the edge slightly. If it begins to fray already after pulling, the patch is of low quality.
The next thing is to turn it upside down. The back should feel firm and stable. Also, pay attention to the weight. When a heavy patch is attached to a thin shirt, its fabric will shrink or fray rapidly. The combination of the patch weight and shirt material should be taken into account.
Sewing on the patch takes around 20 minutes. To ensure that the patch is held in place, fix it and sew a couple of stitches here and there. It is better to use the same thread colour as the border of the patch, but if you want the stitching to be seen, choose a different shade. The stitches should encircle the whole patch and should be small and even. This should take you less time than re-gluing it every couple of weeks.
How Big Should the Patch Be and Where Do You Place It?
Size trips people up more than anything else. Here are rough numbers to start with. Hats take about 2 to 2.5 inches. Left chest is around 3 to 3.5. Bags can handle 3 to 5. Jacket backs go big, roughly 10 to 12 inches.
Numbers aren’t everything, though. The easiest test is to lay the patch on the clothing, stand back, and look in a mirror. A patch that’s too small can get lost on the garment, while too big will swallow the garment.
For good placement, flat and visible areas would be ideal. Stay away from areas that get constant pressure, as this can make the patch wear out quickly. Also make sure not to overdo it. One good patch in the right spot looks better than three fighting for attention. Most caps only need a single patch. Anything more and the front panel starts looking busy.
If you’re covering a hole, go at least half an inch bigger than the damage on every side, so the edges have solid fabric to grip.
What Should You Check Before You Order?
Check the fabric first, both weight and stretch. Read the care label too. If the clothing gets tossed in a hot wash every week, the patch has to survive that.
Watch out for heat. Ironing on patch materials and polyester fabrics don’t always pair well, so always test in a hidden area.
Three to five colours keep the design crisp and help with budgeting, too. Inquire about the thread. Cheap threads can get bleached by light or run in water, and you won’t know it until the patch is dull. Now consider the edge. A clean, finished edge gives the patch a polished, defined look, while a raw edge gives it a flatter, more casual look.
Where Can You Find Good Patches in Texas?
In Texas, patches turn up everywhere, from local football teams and ranches to oilfield companies, military units, and small businesses. There are plenty of suppliers to choose from, but the quality can vary quite a bit.
If you’re hunting for patches in Texas, ask a few plain questions before paying anything. What’s the minimum order? That matters a lot if you only need a handful for a small team. Will they show you a free mockup first? How long does it take to arrive? Can you get a sample of the backing you’re leaning towards? Small orders are fine, because nobody needs to buy in bulk just to try out a design.
Distance is a real factor. The state is huge, and delivery to a remote area can take longer than you’d guess. And then there’s the heat. Long summers can soften some glue-based backings, so ask how the patch holds up in hot weather and repeated washing. Reading a few reviews from people who ordered something similar to your project doesn’t hurt either.
How Do You Find Patches in El Paso?
Buying patches in El Paso allows you to bring your garment directly to the shop. Hold the patch against the fabric, check the thread colour in daylight, and talk about placement face to face. This is something truly difficult when using the internet only.
Local shops also work for you when you have a deadline to meet. Do you have a school team or an event? Ask them what rush orders are available and how fast they can do that for you. Ask if they provide stitching services as well, in case you cannot do that by yourself.
El Paso is a dry region with plenty of sunlight, which leads to outdoor clothes getting a lot of wear and tear over time. Use of high-quality material will prevent fading and fraying.
Your Patch Questions Answered
What kind of patch should I use on a jacket?
For a jacket, you have quite a few choices. Embroidered patches are probably the easiest option if you want that traditional patch look. If the design has lots of small details, go with woven instead. For a big back design, chenille can look good too.
Can I sew a patch onto denim?
Definitely. Denim is actually one of the easier fabrics for patches because it’s fairly strong. A properly sewn embroidered or woven patch should handle normal wear without much trouble.
What should a good quality patch look like?
Check the edge before anything else. It should be clean and tight, without loose threads hanging off it. The patch should also feel reasonably firm. If it feels thin, floppy, or poorly finished, probably look at another one.
Can I put a patch on a pocket cover?
It is acceptable to apply a patch on a pocket cover, but take care that it does not interfere with the opening and closing of the cover. The design should be small enough that it will not come into contact with either the edges or the fastener.
Bottom Line
Pick the job first. Then match the patch type to your design, the backing to your fabric, and the size to where it’s going. Do that, and you’ve dodged most of the usual mistakes.
Prior to making a purchase, place the item on the clothing, examine the perimeter, and obtain a sample. It requires around five minutes, and this will help you get a patch that will look good for many years ahead.