Most figure drawing problems don’t start with shading, but they start with seeing. You draw the pose carefully, you work out all the details, and you also measure a little. However, when you step back from your drawing, your proportions will be incorrect. Your legs appear too long, the torso is too short, and the head does not fit the proportions.
This occurs equally amongst both beginning artists and college students enrolled in fine art programs. The reason why this occurs is that the eye hasn’t developed a good proportion habit. Good artists are not guessing. They are measuring sometimes without even realizing it. Over time, they develop a sense of balance, structure, and proportion that makes their drawings feel natural and believable.
This is the core idea behind drawing and rendering the figure in black and white and colour. The book teaches students to build their drawings step by step using clear measurement methods, simple shapes, and consistent practice. The goal is not perfection. The goal is to train the eye.
Why Proportion Problems Start Early and Stay Too Long
Many students don’t pay attention to their proportions when they first start drawing a figure. After stepping back at the end of the drawing, there is something wrong with the drawing. The pose looks stiff, the body looks thin or stretched, and something about the balance is not correct.
1. Guessing Instead of Measuring
Usually, students have not developed any form of modeling or measuring at the beginning of their learning process, and this causes problems with their drawing later on.
They rely too much on their instinct instead of measuring the figure in a consistent way.
For Example:
A head that is drawn too small makes the torso appear too long and moves the hip up too high. This causes a problem with the balance of the figure. One small guess can lead to many different corrections during the drawing process.
A better way to approach drawing a figure is to use simple measuring devices.
2. Rushing Past the Setup Stage
Students rush through the initial setup stage of drawing. The early stage of drawing should be a quiet and simple time, with light marks, soft shapes, and structural lines. Therefore, since it looks like it is unfinished, students tend to rush this portion of the drawing.
However, this is the stage at which the correct proportional shape of the figure is set on the page. Students should slow down and place the figure on the page carefully, and mark the top, middle, and bottom of the figure.
3. Concentrating On Small Details Too Early
Adding detail to your drawing can be very satisfying. When you add muscles, faces, or shading to your drawing, it is impressive. However, many issues regarding your structure and proportion will be covered up initially instead of being resolved.
As the drawing becomes complicated later on, it will be more difficult to correct all of those initial proportion issues.
Then the best choice in this case would be to plan your drawings more simply for the early stages, using only shapes and measurements, and leave the detail work for later.
4. Not training one’s eye frequently
Your eye improves through practice, and students who don’t do structured practice miss the opportunity to develop good visual judgment and therefore do not improve their accuracy.
Consistency is more important than how quickly you can produce work.
How Consistent Measurement Methods Train Your Eye
Eye Training is about improving your ability to measure consistently until accuracy becomes natural.
Doug White’s method is based on simple, repeatable steps that teach students how to see proportions clearly and develop strong drawing habits.
1. Use Head Height as Your Primary Method for Measuring
Instead of relying on your instincts for the length of a person’s body, use the height of their head as your measurement.
- How To Use Head Height To Measure:
- Mark the top of the head and the bottom of the feet
- Divide the head height sections along the length of the body
- An ideal figure is often around 8 heads tall
- Shorter figures may be 6–7 heads tall
- Why it works:
- Maintains a constant proportion
- Allows for a correct positioning of the torso, hips, knees, and feet
- Eliminates bodies that are too stretched or compressed.
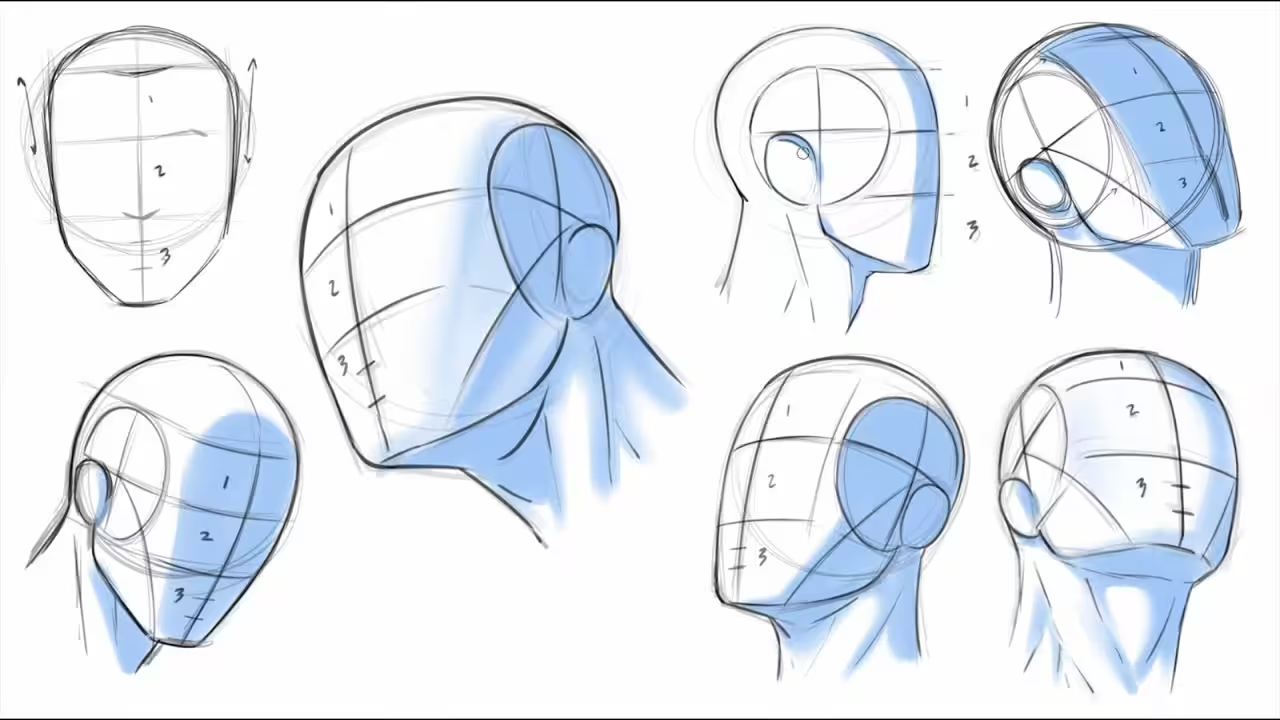
2. Mark Key Points before Drawing the Figure
Before you begin to draw muscles or outlines, lightly mark where each of the four main structures of the body (head, neck, torso, and knees) will be located.
The main key points to mark are:
- Top of the head
- Chin
- Chest line
- Hip
- Knees
- Feet
The reason for making these marks is:
- To create a visual road map.
- To help you maintain balance and spacing.
- Reduces major corrections later.
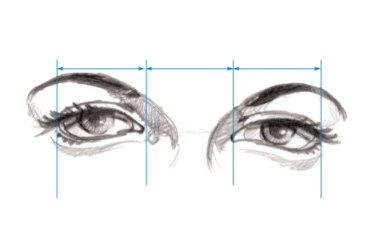
3. For Balance in All Directions
Height is not the only form of proportion. Width is also an important component in achieving balance.
From the examples used in this book:
- A female’s chest should not exceed 75% of her hips.
- A male’s chest should not be any wider than his hips.
- Hip width is often measured in head heights.
- Benefits of using the width measurement:
- Prevents overly narrow or wide bodies
- Keeps figures believable and balanced
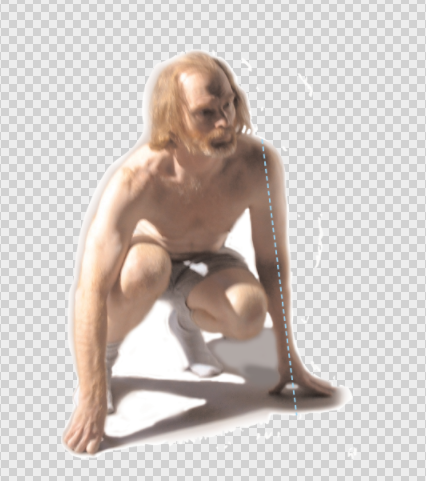
4. Use Axis and Seam Lines for Alignments
Axis and seam lines provide visual references for position and balance. An axis line shows the angle and inclination of either a chest or a hip.
- A seam line separates the body into left and right halves.
- A seam line helps with properly positioning the head relative to the chest and torso.
- Benefits of using axis and seam lines:
- Gives an objective visual reference as to how the body looks three-dimensionally.
- Facilitates the identification of twisting and imbalance.
Using the same measuring methods for every work of art is the best way to develop the visual memory necessary for consistency.
The Role of Step-by-Step Practice in Improving Accuracy
Accuracy doesn’t come from talent alone. It comes from repeating a clear process again and again until your eye starts recognizing the correct proportion automatically.
Doug White’s method is built around simple, structured practice. Each stage has a purpose, and each step helps train both the hand and the eye.
Step 1: Start With Placement and Size
What you should do:
- Find the highest point of the head and the lowest point of the feet
- Find the middle of the figure or half way point.
- Use light and soft pencil marks to establish these points.
- Why is this step important?
- Helps prevent your figure from being too big or too small
- Control the proportions of your figure from the start
- Helps the figure to be visually balanced on the page
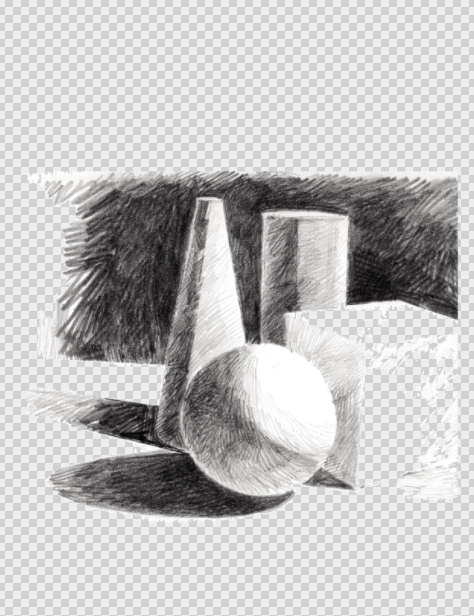
Step 2: Build With Simple Shapes
Instead of jumping to draw the outline of the figure, start with basic shapes.
- Examples:
- Chest = flared tube
- Hips = short barrel or cylinder
- Arms and legs = tubes
- Head = simple block or oval
- Why is this step important:
- When you understand your basic shapes, it is much easier to picture how the body should look.
- Shapes help you to relate the 3D structure of the body.
- You improve your consistency across the drawings you create.
Step 3: Add Measurement and Reference Lines
After you have put down your shapes, use measuring tools to help you get proportions right.
- Include:
- Head-height divisions
- Axis lines for rotation
- Seam lines for center balance
- Why this is important:
- Allows you to catch errors before they become an issue
- Improves perspective and posture
- Increases overall accuracy
Step 4: Move to Details Only After Structure Works
After you have achieved a balanced feel for the drawing, add:
- Muscles
- Facial Features
- Value or Color
- Why this is important:
- Prevents details from hiding proportion errors
Keeps the drawing clear and controlled
Builds confidence step by step
Train Your Eye More Than Your Hand
The majority of students believe that more lines produce a better drawing. However, the most important way to improve is to see better first.
Proportion problems appear early because the eye is still learning how to measure and compare. Without a clear process, mistakes repeat and slowly turn into habits. The good news is that the eye can be trained. And it becomes stronger with simple, consistent practice.
Using a solid system of measuring techniques, basic shapes, axis lines, and a step-by-step approach allows students to better understand what they are drawing in a logical manner. Instead of guessing at how to draw, students start to observe what they see. Instead of fixing errors at the end of a drawing, students will begin to make a foundation of accuracy at the beginning of their drawings.
So take your time, measure before you draw, build your structure, and finally, let your drawing grow naturally.